Wednesday, December 22, 2010

iPad etc.

Today I had my first touch with most hated mobile device ever - Apple iPad. I won internal contest organized by my employer, GG Network. It was all about creating application using new API of GG social site. If someone is interested - public edition of the competition end on 31 of December and you can win 30.000PLN (about 10000$). In week, maybe two I will write something more about the API and publishing apps on GG.pl (it has more than 10 millions of users and just about 50 apps so far - best way for promoting your apps).

There were thousands of iPad's reviews all over the web, so I want to write one single sentence from gamedeveloper's point of view. Porting one of my Javascript game to run on the device took me about 7 minutes - I add simple code for screen size detection, now it is possible to run 'Zombie Eliminator' in any browser, without resolution issues. It is the biggest advantage of Javascript programming - it will run on different platforms out of the box. When I will finish my Game On entry I will try to write something more about iPad gamedev.

Oh, and my new game is available in SamsungApps since yesterday - tetris-like logic puzzle with jewels - try it here.

Friday, November 12, 2010

Using css3 transformations for sprite animation

Inspired by Kamil Trebunia's speech on FrontTrends so as "Practical HTML5" presentation by Jeremy Orlow & Malte Ubl on Google Developer Day in Munich two days ago, I decide to test if using transformations provided by CSS3 really improves performance of JavaScript games for mobile devices. Kamil said about fastest page redrawing using translate instead of position absolute & top/left attributes. Google guys presented css3 transformations with hardware acceleration. It looks nice so I made a little performance test.
I create simple 'Frames per seconds' counter and run it with 100 animated sprites, each with 4 frames (actually every sprite has 8 frames, but I used only 4 of them) and random movement. The sprites were penguins drawn by me some time ago, based on Antarctic Adventures for NES (one of my favorite games back in '90). I made three tests on my Samsung bada - one using canvas for rendering everything, second one with 'Div with overflow:hidden' method I described in one of the latest posts, and the third one similar to 2nd, but with css3 translation instead of top/left changes. The result was quite surprising - classical DOM manipulation animation had 11-12fps, Css3 transition method reached 10-13fps, and canvas rendering about 27fps. I know that there is wrong way of thinking somewhere, but I have no idea what exactly goes wrong. Any suggestions? You can find the source on my github account: [michalbe]

Saturday, October 23, 2010

Front Trends 2010 in a few words - 2nd day

First day of FT2010 was described [here]. Now let me share my experiences from the second one.


First speech of the second day of Front Trends was opened by Jake Archibald. It was all about designing and creating flexible APIs. We learned that API needs to be designed before any code is written - otherwise young boys will watch movies about cocks with their mothers. Also - good API is like Patrick Stewart (who hates PHP) and most of the world's problems are caused by Java. Jake discussed also different use cases of typical API on the example of creating the carousel element on the web page. It was one of the most interesting presentations during the FT - both in terms of content and form. Great job! [watch it here]

Another lecture was prepared by Christian Johansen. He presented the idea of Test Driven Development using Live Search jQuery plugin as an example. There was a bit of theory and a lot of live coding.

I was really looking forward for the PhoneGap speech by Kamil Trebunia, former employee of Nokia. He started with advantages of cross-device development and presented basic aspects of creating applications using HTML5 techniques. Then showed crossmobile tools like Phonegap or Titanium Mobile with their pros & cons. After discussing jQuery Mobile and Sencha Touch as examples of JS mobile frameworks Kamil shows few hacks and tricks for performance boost, like optimizing reflows (using CSS3 transformations instead of changing absolute style attributes like positions or margins, etc.). After the speech we had nice talk about future of cross mobile development together with Markus Leutwyler and one Wikipedia guy from Italy, unfortunately I forgot his name.

Another very interesting speech was prepared by Professor of Mechanical Engineering from Dortmund University of Applied Sciences and Arts, Stefan Gössner. He began his speech with the question - why not to use modified physics engines for games, like Box2d, in scientific simulations? And, in addition, why not to make it as a web application using Javascript & Canvas? Results of his work was amazing - prof. Stefan presented couple of real life examples of mechanical simulations, like solid body on a spring, typewriter or Mercedes Benz's wipers mechanism. Everything works smooth, fast and most importantly - it looked convincingly. Rest of the talk he was describing different representations of physics data like vectors, matrices etc., everything supported with performance tests.

Peter-Paul Koch, author of the well known Quirksmode.org was the last speaker at Front Trends. He was generally talking about the future of the mobile apps - about 10$ smartphones available worldwide in 2018, about ridiculous at least 41 App Stores, free HTML5 apps with paid content, shared via Bluetooth on wide variety of devices and systems. Ppk mentioned also some hypothetical javascript mobile browser's events, like onphonecall or oncompasspointnorth and gives examples of using them in real life applications. He also answered lot of questions about his vision of the mobile future and some less clever also ( - You think iPad is more mobile or desktop device? - Yes.).

Unfortunately I was not able to be present on all of the lectures - I regret the most "Mobile UX and current trends in mobile design" by Anthony Ribot. If there is any video from that one please publish it somewhere!

I would like to thank anyone I was talking with. Also organizers for that awesome event. And guys from PALM for my PRE phone (I hope so, it still stuck at customs:) ). It was exciting to meet first league of world's frontend developers not even leaving my own city. I hope I will feel the same after FalsyValues!

Thursday, October 21, 2010

Front Trends 2010 in a few words

First day of Front Trends conference is behind us now. First time ever so many JavaSript 'gurus' met in Poland. As the participant of this event I would like to write a few words about it.

Conference was opened by the organizers - Damian Wielgosik & Pawel Czerski. They said few words about the dreams, writing anonymous emails to famous people, and organizing conference from scratch. I respect Damian for everything he is making for Javascript community, but that part looks really bad. It was delayed, unprepared, and above all just uninteresting for the developers. Searching for #ft2010 on twitter just after it starts I could read a lot of comment like that.
But the worst part of the opening was short speech made by ZlapTaxi guy, who said at the beggining that if you want to make cross-mobile application you have to build huge team of Java, Objective-C, Symbian C, Cpp and God only knows what other developers (have you ever heard of PhoneGap? Oh, sorry, it was next presentation and it is so hard to read all that up to date stuff in the Internet). After explaining how to use his catch-a-taxi app and announcing a contest, he state that if you will find girl in Front Trends tshirt somewhere there, she could helps you order a taxi. So why he build that app for if there are girls to do this? Never mind.

First speech I was attending in was "You know webOS" by Markus Leutwyler. Markus presented webOs history, main tasks, and devices that webOS is running on (even kind of printer with that Os - sick!). After that he discussed basics of webOs development - Mojo framework, building and connecting Scenes & Controllers. He finished with few words about jailbreaking and rooting Palm devices, testing & packaging created apps. Everything was clear and nice (especially I like his pronunciation of the name "webOS", maybe it is Swiss accent or something, I'm not sure:) ), but if you ever create even one simple webOs application - you already know everything Markus was talking about. For sure - if I hadn't written anything on webOS before,I would start after this lecture!

In the second talk Robert Nyman showed us main features of HTML5. He said a little about history of language, coercion, falsy values, video and audio elements and it's hacks, few words about webstorage and cookies and gives us nice example of FileAPI. Each comparison of 'old' methods and 'brand new HTML5' manner was served in funny, enjoyable way, with a lot of Forrest Gump or other pop culture references (Why Rachel from "the Friends" sitcom was sad after her boyfriend left her? Because she needs closure!)

Andrea Giammarchi a.k.a. WebReflection prepared nice speech about Javascript performance on different devices. He showed us couple of performance tests and explained each one. As the summary of the talk he state that if you want you app to run fastest as possible you have to create it for given browser and use browser-specific hacks for performance boost. Check Andrea's blog for more details.

Before the lecture of Kyle Simpson I was wondering, what is that all Javascript Middle-end stuff about. He explained everything using nice, simple slides and charts in about a half of his time. Starting from traditional MVC architecture (the "boring" one) he presents new Clients Views Controllers architecture in which all the logic made in the templates before, is now moved to the middle-end layer. In this manner of creating web applications there are no single condition or equation in the templates. Sounds great. Next he showed sources of his Shortie.me page build using his Bikechain.js - minimal server-side JavaScript wrapper environment.

Last speech for today was prepared by Douglas Crockford. I must say that I was a little bit disappointed - I've already seen this! His "Javascript server-side" lecture was modified version of his Loopage presentation from YUI Theater. Yes, I know - that is all my false - I watch every Crockford's video available on the Internet.
Undeniably - the best part of today's event was Panel Discussion with Tantek Celik, Peter-Paul Koch & Mr Crockford. It was more than one and a half hour of pure Javascript discussion, so it is impossible to quote everything. Most interested things I've learned from the panel:
- differences between API's and implementations are consequence of using technology before specification is finished,
- Flash took place in the web market because HTML was not able to make awesome things. Now it is, so we have to forget about Flash,
- web developers are the most stupid and the laziest people ever
- people are watching so much porn that they have to download JS libraries each time they visit site that is using it:)
- and if you want to be good JS developer you must use js frameworks and you couldn't use it simultaneously.

Tomorrow second day. I'm really looking forward for it!

UPDATE: read next part [here]

Friday, October 15, 2010

Four methods of Javascript animation

Quoting Wikipedia:
Animation is the rapid display of a sequence of images in order to create an illusion of movement.

There are few methods to achieve that effect in JS, and I will discuss four of them in here.

1. Canvas animation
I used canvas animation in my Javascript game tutorial, but let's describe it once again. As an example, I will animate jump frames from my very favorite game days ago, Prince of Persia, you can find it on the right side of the post.
Before stating any animation related stuff it's necessarily to define few variables common for all four methods. Let's do this:
var width = 100,
    height = 86,
    frames = 10, 
//our PoP jumping animation has 11 frames, but we count from 0
    
    actualFrame = 0,
       
    posX = 100,
    posY = 100,
//X & Y position of the element

    canvas = document.createElement('canvas'),
//'canvas' variable will be always main element of an animation, not always  type
    canvasStyle = canvas.style,
    ctx = canvas.getContext("2d"),
    image = document.createElement('img');
 
    image.src = 'sprite.jpg';
 
    canvasStyle.position = "absolute";
    canvasStyle.top = posX;
    canvasStyle.left = posY;

    canvas.width = width;
    canvas.height = height;
//width & height are assigned directly to th canvas, not to the canvasStyle because in the other case it would scale the element, not change its size.
    document.body.appendChild(canvas);
 
var draw = function(){
//main function for rendering each frame, here will all the animation logic goes.
} 

setInterval(draw, 80);
//main loop        
To animate our character we need just to display next frames of the jump on the canvas. It's not necessarily to clear whole surface each time in this particular case, because it has the same size as single frame. The draw function will looks like that:
var draw = function(){
    ctx.drawImage(image, 0, height * actualFrame, width, height, 0, 0, width, height);
//the attributes are: image to draw, X coord of the source image, Y coord of the source image, width & height of the cut piece (frame size), X & Y destination coords (our canvas) and destination frame size (not always the same as the source one, eg in case of scaling the frame)

    if (actualFrame == frames) {
        actualFrame = 0;
    } else {
        actualFrame++;
    }
//looping the frames, it is also the common part of all draw() function in this post
} 
So that is the first method of JavaScript animation.
Pros:
- it uses canvas (the future of HTML5 games)
- it's possible to scale, rotate, flip, etc. the frames in browsers that support canvas but no CSS3
- probably much more

Cons:
- need to clear whole canvas to draw another frame
- not supported in old browsers
- quite complex math for display single frame

Life example: [1. Canvas Animation]

2. Background looping
I think it was one of the firstmethods of sprite's animation in web browsers. It is the simplest way ever. Just create div element with background, and change backgroundPosition on each frame. Piece of cake. Try:
var canvas = document.createElement('div'),
//div element is now our 'canvas'
    canvasStyle = canvas.style;
    
    canvasStyle.backgroundImage = "url(sprite.jpg)";
//and our image is just it's background
    canvasStyle.position = "absolute";
    canvasStyle.top = posX;
    canvasStyle.left = posY;

    canvasStyle.width = width;
    canvasStyle.height = height;
//width & height are now assigned to the 'style', not directly to the element
    document.body.appendChild(canvas);
    
var draw = function(){
    canvasStyle.backgroundPosition = "0 -"+height * actualFrame;
//each frame background image moves up, that's why there is minus sign before the value, you can multiply (height * actualFrame) by negative one, it gives the same effect
(...) //here goes frame changing logic from the 1st example
}
Pros:
- simplicity
- works everywhere

Cons:
- not possible to scale, rotate, etc. without CSS3

Example: [2. Background looping animation]

3. Clip-rect method
Hmm, but what when we wan't our game to run on full screen, or on different devices with various resolutions? Changing size of the div from second example gives nothing, just looks ugly. So this is where I introduce clip:rec(), Css attribute of img element. Quoting W3schools:

The clip property lets you specify the dimensions of an absolutely positioned element that should be visible, and the element is clipped into this shape.

Let's try:
var canvas = document.createElement('img'),
//image is not the canvas
    canvasStyle = canvas.style;
    
    canvas.src = 'sprite.jpg';
(...)//rest of the attributes
var draw = function(){
    var frameTop = height * actualFrame, 
        frameLeft = 0, 
        frameRight = width, 
        frameBottom = frameTop + height;
//a little math here for each frame
                                 
    canvasStyle.clip = "rect("
        +frameTop +"px " //top
        +frameRight +"px " //right
        +frameBottom +"px " //bottom
        +frameLeft +"px )"; //left
                                      
    canvasStyle.top = posY - height * actualFrame;
//IMPORTANT: even if we crop piece of source image, it's top & left attrs dont change - it's necessarily to move it to the fixed position. That's what I made above.
Pros:
- only one element needed (just img)
- possibility of scaling without CSS3
- crossbrowser

Cons:
- not possible to rotate, flip, etc
- very lot of math needed on each move/frame changing.

Example: [3. Clip-rect method]

4. Div with overflow:hidden
The last way of animation I want to present is simplest than 3rd one, better than 2nd, and doesn't use canvas. The whole philosophy is to create one div element with image inside, display only part visible in div, and move the image in proper way. Like this:
var canvas = document.createElement('div'),
    canvasStyle = canvas.style,
    image = document.createElement('img'),
    imageStyle = image.style;
    
    image.src = 'sprite.jpg';
//div is the 'canvas' now, but it has an image inside
    
    canvasStyle.position = imageStyle.position = "absolute";
    canvasStyle.top = posX;
    canvasStyle.left = posY;
    canvasStyle.overflow = "hidden";
//that is very important
    canvasStyle.width = width;
    canvasStyle.height = height;
    
    imageStyle.top = 0;
    imageStyle.left = 0;
    canvas.appendChild(image);
    document.body.appendChild(canvas);
//put image in the canvas/div and add it all to the body of the document.    
var draw = function(){
                                 
    imageStyle.top = -1*height * actualFrame;
//as in the 3rd example - direction of the move must be negative. Otherwise animation will be played backwards   
    if (actualFrame == frames) {
        actualFrame = 0;
    }
    else {
        actualFrame++;
    }
    
} 
Pros:
- possibility of scaling without CSS3
- crossbrowser
- much simpler than clip:rect()

Cons:
- not possible to rotate, flip, etc
- two elements needed (img & div)

Example: [4. Div with overflow:hidden]

Changing size of animated elements is very important in gamedev. So as simplicity. That's why in my new JS game engine I will implement both, canvas and overflow:hidden methods. You can find all the sources on my GitHub account: [Javascript animation]

Thursday, September 30, 2010

Tutorial: Simple game with HTML5 Canvas - part 5

Tutorial: Simple game with HTML5 Canvas
Part 1 - Introduction & Background
Part 2 - Character & Animation
Part 3 - Physics & Controls
Part 4 - Platforms & Collisions
Part 5 - Scrolling & Game States

First of all I want to thanks for the responses to my tutorial, all the comments, emails and tweets I receive. It's an awesome feeling - to be aware that someone is reading all that stuff and even likes it. Oh, and don't forget to follow me on Twitter - http://twitter.com/michalbe.

Part 5a. SCROLLING & POINTS
During the last lesson we teach our angel how to use platforms. Now let him jump higher than screen height. To obtain that we need to use trick as old as platform games - stop the character in one place and move everything else in opposite direction. In our example angel will stop in the middle of the screen and rest of the speed will move background and platforms down. Let's modify checkJump() method of the player:
(...)
that.checkJump = function() {     
    if (that.Y > height*0.4) {
//if player is under about half of the screen - let him move
        that.setPosition(that.X, that.Y - that.jumpSpeed);        
    } else {
//in other dont move player up, move platforms and circles down instead
        MoveCircles(that.jumpSpeed * 0.5); 
//clouds are in the background, further than platforms and player, so we will move it with half speed
        
        platforms.forEach(function(platform, ind){
            platform.y += that.jumpSpeed;

            if (platform.y > height) {
//if platform moves outside the screen, we will generate another one on the top
                var type = ~~(Math.random() * 5);
                if (type == 0) 
                    type = 1;
                else 
                    type = 0;
                platforms[ind] = new Platform(Math.random() * (width - platformWidth), platform.y - height, type);
            }
        });
    }
    
    
    that.jumpSpeed--;
    if (that.jumpSpeed == 0) {
        that.isJumping = false;
        that.isFalling = true;
        that.fallSpeed = 1;
    }

}
When the platform moves outside the screen we will generates another one on the top, but not directly on 0-y, because we need to keep the distance between the platforms. So first we calculate how far it goes under the bottom, subtract hat value from total height and generate platform on that Y with random X. Yes, I know that it will show up suddenly in the middle of the screen, but while whole attention of the player is focused on the character, no one will notice that.
Ok, it is possible now to jump as high as we want, but there are still couple of things to fix, eg difficulty level.
To make everything harder let's give movement ability to some platforms. The higher your character will be, the faster platforms will move. To achieve this, first we will implement very simple points system, and after that modify a little Platform object and GameLoop() part responsible for drawing platforms.
var width = 320, 
    height = 500,
    gLoop,
    points = 0,
//adding points to global variables
(...)

var Platform = function(x, y, type){
(...)
    that.isMoving = ~~(Math.random() * 2);
//first, let's check if platform will be able to move (1) or not (0)
    that.direction= ~~(Math.random() * 2) ? -1 : 1;
//and then in which direction
(...)
}

var GameLoop = function(){
    clear();
    DrawCircles();

    if (player.isJumping) player.checkJump();
    if (player.isFalling) player.checkFall();
 
    player.draw();
//moving player.draw() above drawing platforms will draw player before, so platforms will be drawn over him. It looks better that way because sometimes angel 'sinks' in the platform with his legs.

    platforms.forEach(function(platform, index){
        if (platform.isMoving) {
//if platform is able to move
            if (platform.x < 0) {
//and if is on the end of the screen
                platform.direction = 1;
            } else if (platform.x > width - platformWidth) {
                platform.direction = -1;
//switch direction and start moving in the opposite direction
            }
            platform.x += platform.direction * (index / 2) * ~~(points / 100);
//with speed dependent on the index in platforms[] array (to avoid moving all the displayed platforms with the same speed, it looks ugly) and number of points
        }
        platform.draw();
    });
Increasing points should be implement in player.checkJump(), after checking if player is in the middle of the screen:
that.checkJump = function() {
    if (that.Y > height*0.4) {
        that.setPosition(that.X, that.Y - that.jumpSpeed);        
    } else {
        if (that.jumpSpeed > 10) points++; //here!
        MoveCircles(that.jumpSpeed * 0.5);
(...)
When everything is already drawn we could render GUI on the top of everything. So add in GameLoop(), just before calling another frame:
ctx.fillStyle = "Black";
//change active color to black
ctx.fillText("POINTS:" + points, 10, height-10);
//and add text in the left-bottom corner of the canvas
Part 5b. GAME STATES
Everything works cool, but it is not possible to lose. In case we use setTimeout() instead of setInterval(), we need to create boolean variable with game state. It will be 'true' during the game and 'false' when game ends. It is nice to prepare also some GameOver screen. Let's start with adding new variables and modifying GameLoop().
var width = 320, 
    height = 500,
    gLoop,
    points = 0,
    state = true,
(...)

var GameLoop = function(){
(...)
//go to another frame only when state is true
    if (state)
        gLoop = setTimeout(GameLoop, 1000 / 50);
(...)
}

//GameOver screen
var GameOver = function(){
    state = false;
//set state to false
    clearTimeout(gLoop);
//stop calling another frame
    setTimeout(function(){
//wait for already called frames to be drawn and then clear everything and render text
        clear(); 
        ctx.fillStyle = "Black";
        ctx.font = "10pt Arial";
        ctx.fillText("GAME OVER", width / 2 - 60, height / 2 - 50);
        ctx.fillText("YOUR RESULT:" + points, width / 2 - 60, height / 2 - 30);
    }, 100);
};
Now we must determine when to stop the game and display GameOver Screen. We need to modify player's checkfall() method
that.checkFall = function(){
    if (that.Y < height - that.height) {
        that.setPosition(that.X, that.Y + that.fallSpeed);
        that.fallSpeed++;
    } else {
        if (points == 0) 
//allow player to step on the floor at he beginning of the game
            that.fallStop();
        else 
            GameOver();
    }
}
And that's all! Thank you one more time for your time. I'm waiting for questions and ideas of improvement so feel free to ask/write. As usual: - sources on github Simple game with HTML5 Canvas - and working example on jsbin: Simple game with HTML5 Canvas Tutorial: Simple game with HTML5 Canvas Part 1 - Introduction & Background Part 2 - Character & Animation Part 3 - Physics & Controls Part 4 - Platforms & Collisions Part 5 - Scrolling & Game States

UPDATE
I would like to thanks anyone who found my Simple HTML5 canvas game tutorial useful. I receive a lot of emails, tweets, and couple of comments in here with a lot of positive feedback. I know also that some of you tried to create own games based on my tips. Below I put links to games I know about, I hope authors don't mind. If you also have leaned something from my tutorial, and created anything interesting with it, feel free to write me about that, I will put your link here also.

Sunday, September 19, 2010

Tutorial: Simple game with HTML5 Canvas - part 4

Tutorial: Simple game with HTML5 Canvas
Part 1 - Introduction & Background
Part 2 - Character & Animation
Part 3 - Physics & Controls
Part 4 - Platforms & Collisions
Part 5 - Scrolling & Game States

Part 4a. DRAWING THE PLATFORMS
There are two types of platforms our character is able to jump on - ordinary one (orange) and green one - trampoline, gives extra speer and hyper-ultra-high jump. There are always seven platforms on the screen at the time (I tried different number, from 4 to 10 and only 7 works fine with screen size I declare at the beginning). Let's create Platform "class" (function platforms will inherit from).
var Platform = function(x, y, type){
//function takes position and platform type
var that=this;

that.firstColor = '#FF8C00';
that.secondColor = '#EEEE00';
that.onCollide = function(){
player.fallStop();
};
//if platform type is different than 1, set right color & collision function (in this case just call player's fallStop() method we defined last time
if (type === 1) {
//but if type is equal '1', set different color and set jumpSpeed to 50. After such an operation checkJump() method will takes substituted '50' instead of default '17' we set in jump().
that.firstColor = '#AADD00';
that.secondColor = '#698B22';
that.onCollide = function(){
player.fallStop();
player.jumpSpeed = 50;
};
}

that.x = ~~x;
that.y = y;
that.type = type;

return that;
};
Now it's necessary to create function which will generate all that platform stuff and put it into platforms[] array we will define shortly. After that it will be nice to draw the platforms on the screen.
var nrOfPlatforms = 7, 
platforms = [],
platformWidth = 70,
platformHeight = 20;
//global (so far) variables are not the best place for storing platform size information, but in case it will be needed to calculate collisions I put it here, not as a Platform attributes
var generatePlatforms = function(){
var position = 0, type;
//'position' is Y of the platform, to place it in quite similar intervals it starts from 0
for (var i = 0; i < nrOfPlatforms; i++) {
type = ~~(Math.random()*5);
if (type == 0) type = 1;
else type = 0;
//it's 5 times more possible to get 'ordinary' platform than 'super' one
platforms[i] = new Platform(Math.random()*(width-platformWidth),position,type);
//random X position
if (position < height - platformHeight) 
position += ~~(height / nrOfPlatforms);
}
//and Y position interval
}();
//we call that function only once, before game start
Extending Platform object with draw() method:
var Platform = function(x, y, type){
(...)
that.draw = function(){
ctx.fillStyle = 'rgba(255, 255, 255, 1)';
//it's important to change transparency to '1' before drawing the platforms, in other case they acquire last set transparency in Google Chrome Browser, and because circles in background are semi-transparent it's good idea to fix it. I forgot about that in my 10kApart entry, I think because Firefox and Safari change it by default
var gradient = ctx.createRadialGradient(that.x + (platformWidth/2), that.y + (platformHeight/2), 5, that.x + (platformWidth/2), that.y + (platformHeight/2), 45);
gradient.addColorStop(0, that.firstColor);
gradient.addColorStop(1, that.secondColor);
ctx.fillStyle = gradient;
ctx.fillRect(that.x, that.y, platformWidth, platformHeight);
//drawing gradient inside rectangular platform
};

return that;
};
Platform must be drawn on each frame, so updating GameLoop() is a must.
var GameLoop = function(){
(...)
platforms.forEach(function(platform){
platform.draw();
});
(...)
};
Part 4b. COLLISIONS Nice, but there is no interaction between angel and the platforms. But one little function will handle everything. Let me introduce checkCollision():
var checkCollision = function(){
platforms.forEach(function(e, ind){
//check every plaftorm
if (
(player.isFalling) && 
//only when player is falling
(player.X < e.x + platformWidth) && 
(player.X + player.width > e.x) && 
(player.Y + player.height > e.y) && 
(player.Y + player.height < e.y + platformHeight)
//and is directly over the platform
) {
e.onCollide();
}
})
}
Another update of main loop (it is good moment to comment line with MoveCircles() function - if platforms are standing still why background is falling down? It will makes more sense when we will implement platform scrolling. Whole GameLoop() function should looks like that now:
var GameLoop = function(){
clear();
//MoveCircles(5);
DrawCircles();

if (player.isJumping) player.checkJump();
if (player.isFalling) player.checkFall();

platforms.forEach(function(platform){
platform.draw();
});

checkCollision();

player.draw();
gLoop = setTimeout(GameLoop, 1000 / 50);
}
Final result: [platforms & collisions demo] Source: [MichalBe Github] I think next part will be the last one, but who knows:).

Tutorial: Simple game with HTML5 Canvas
Part 1 - Introduction & Background
Part 2 - Character & Animation
Part 3 - Physics & Controls
Part 4 - Platforms & Collisions
Part 5 - Scrolling & Game States

Friday, September 17, 2010

Samsung approval and Thai fonts

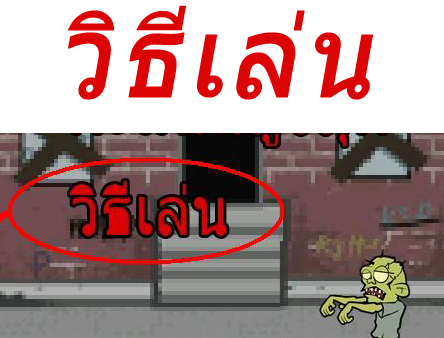
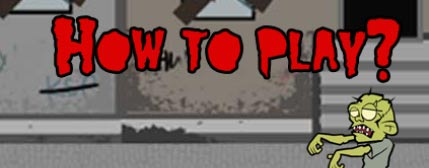
Is it really impossible for Thai people to read their alphabet when some single gaps will be filled in? Latin alphabet I use every day has evolved through the ages in countless different fonts and shapes, from handwriting, Gothic fonts, print characters, to graffiti. And I'm able to read all of them, just like most people in the world. So why people of Thailand couldn't understand single word when I use custom font with filled gaps? Or maybe that is just another odd invention of Samsung testers? My Zombie Eliminator was removed from Thai Samsung Apps Catalog because, as they said, "Font is not good in Thailand". Why you couldn't understand this ('original' word above, and red mark on the screenshot made by Samsung Content Inspector):
...when Latin alphabet is totally understandable for me and rest of the world, even with filled gaps (like 'o' or 'p'):
Thursday, September 16, 2010

Tutorial: Simple game with HTML5 Canvas - part 3

Tutorial: Simple game with HTML5 Canvas
Part 1 - Introduction & Background
Part 2 - Character & Animation
Part 3 - Physics & Controls
Part 4 - Platforms & Collisions
Part 5 - Scrolling & Game States

Part 3a. PHYSICS
Because physics in StH is very simple, there is no need to include any Physics Engine such as Box2d. Jumping is so uncomplicated that it is possible to implement it just in few code lines.
Let's divide it into two unrelated parts - jumping and falling. When object start to jump, it has some initial velocity, deceased by gravity. It phase ends when that velocity is completely reduced and gravity starts to attract object down with increasing force. That is the second part of the jump - falling. To teach angel how to behave in such situations, let's expand player object with few more attributes:
var player = new (function(){
var that = this;
that.image = new Image();
(...)

//new attributes
that.isJumping = false;
that.isFalling = false;
//state of the object described by bool variables - is it rising or falling?

that.jumpSpeed = 0;
that.fallSpeed = 0;
//each - jumping & falling should have its speed values

(...) //rest of the code
})();
Now lets introduce methods responsible for jumping. Further expanding of player object:
that.jump = function() {
//initiation of the jump
if (!that.isJumping && !that.isFalling) {
//if objects isn't currently jumping or falling (preventing of 'double jumps', or bouncing from the air
that.fallSpeed = 0;
that.isJumping = true;
that.jumpSpeed = 17;
// initial velocity
}
}

that.checkJump = function() {
//when 'jumping' action was initiated by jump() method, initiative is taken by this one.
that.setPosition(that.X, that.Y - that.jumpSpeed);
//move object by number of pixels equal to current value of 'jumpSpeed'
that.jumpSpeed--;
//and decease it (simulation of gravity)
if (that.jumpSpeed == 0) {
//start to falling, similar to jump() function
that.isJumping = false;
that.isFalling = true;
that.fallSpeed = 1;
}

}

that.checkFall = function(){
//same situation as in checkJump()
if (that.Y < height - that.height) {
//check if the object meets the bottom of the screen, if not just change the position and increase fallSpeed (simulation of gravity acceleration)...
that.setPosition(that.X, that.Y + that.fallSpeed);
that.fallSpeed++;
} else {
//..if yes - bounce
that.fallStop();
}
}

that.fallStop = function(){
//stop falling, start jumping again
that.isFalling = false;
that.fallSpeed = 0;
that.jump();    
}
It's necessarily to update main loop function to redraw player's position while jumping and falling. Update GameLoop() with this code, just before drawing the character:
if (player.isJumping) player.checkJump();
if (player.isFalling) player.checkFall();
I think above code is clear enough to understand. Last action we have to take with all that physics stuff is simply initiation of the first jump, right after placing player on the stage.
player.setPosition(~~((width-player.width)/2), ~~((height - player.height)/2));
player.jump(); //here
Ok, it's jumping beautifully, piece of awesome pseudo-physics code. Now let's make some controls. Part 3b. CONTROLLS Main character of StH can move sideways only. It jumps automatically, up/down movement depends of platforms. User can only command angel to move left or right. One more time it could be achieved by with extension player object with additional methods.
var player = new(function(){
(...)
that.moveLeft = function(){
if (that.X > 0) {
//check whether the object is inside the screen
that.setPosition(that.X - 5, that.Y);
}
}

that.moveRight = function(){
if (that.X + that.width < width) {
//check whether the object is inside the screen
that.setPosition(that.X + 5, that.Y);
}
}
(...)
})();
Now bind that functions to the mouse pointer position (angel will follow it).
document.onmousemove = function(e){
if (player.X + c.offsetLeft > e.pageX) {
//if mouse is on the left side of the player.
player.moveLeft();
} else if (player.X + c.offsetLeft < e.pageX) {
//or on right?
player.moveRight();
}
}
It's everything for today. In next episode I will introduce platform drawing and collisions. As usual: [demo with jumping & controls] [source in GitHub repo]

Tutorial: Simple game with HTML5 Canvas
Part 1 - Introduction & Background
Part 2 - Character & Animation
Part 3 - Physics & Controls
Part 4 - Platforms & Collisions
Part 5 - Scrolling & Game States

Saturday, September 11, 2010

Tutorial: Simple game with HTML5 Canvas - part 2

Tutorial: Simple game with HTML5 Canvas
Part 1 - Introduction & Background
Part 2 - Character & Animation
Part 3 - Physics & Controls
Part 4 - Platforms & Collisions
Part 5 - Scrolling & Game States

Part 2. CHARACTER
It is time now to add main character to the awesome background created in the last part. In StH it was cute little angel with simple wing flapping animation in just two frames, saved in .png with transparent background. Exactly like this one:
Let's create object representing main character with all necessarily methods and attributes. I will call it 'player'. The way of creating objects I present here is not the best one, all the attributes are visible from outside the object, there is no privacy at all. But that was simplest and shortest solution I was able to implement to fit 10KB, and most importantly - it works. If you want to know how to define proper objects with private attributes, inheritance, etc. read about Javascript Closures. Also it's important to remember, when you want to shrink your code with tools like Closure Compiler, that names of object's arguments won't change. That why in original code I use 2 letters shortcuts for describing player object, like 'player.im' instead of 'player.image', etc. SO, the object:
var player = new (function(){
//create new object based on function and assign 
//what it returns to the 'player' variable

    var that = this;
//'that' will be the context now

//attributes
    that.image = new Image();
    that.image.src = "angel.png";
//create new Image and set it's source to the 
//'angel.png' image I upload above

    that.width = 65;
//width of the single frame
    that.height = 95;
//height of the single frame

    that.X = 0;
    that.Y = 0;
//X&Y position

//methods 
    that.setPosition = function(x, y){
    that.X = x;
    that.Y = y;
}

    that.draw = function(){
        try {
            ctx.drawImage(that.image, 0, 0, that.width, that.height, that.X, that.Y, that.width, that.height);
//cutting source image and pasting it into destination one, drawImage(Image Object, source X, source Y, source Width, source Height, destination X (X position), destination Y (Y position), Destination width, Destination height)
        } catch (e) {
//sometimes, if character's image is too big and will not load until the drawing of the first frame, Javascript will throws error and stop executing everything. To avoid this we have to catch an error and retry painting in another frame. It is invisible for the user with 50 frames per second.
        }
    }
})();
//we immediately execute the function above and 
//assign its result to the 'player' variable
//as a new object 

player.setPosition(~~((width-player.width)/2),  ~~((height - player.height)/2));
//our character is ready, let's move it 
//to the center of the screen,
//'~~' returns nearest lower integer from
//given float, equivalent of Math.floor()
Ok, so now the angel needs to be redrawn on each frame. GameLoop() will be updated with player.draw() function:
var GameLoop = function(){
    clear();
    MoveCircles(5);
    DrawCircles();
    player.draw();
    gLoop = setTimeout(GameLoop, 1000 / 50);
}
But what about animation? Angel sprite has 2 frames, but only one is redrawn on each frame. To make an animation, our player needs additional attributes and a little changes in draw() method.
var player = new (function(){
(...)
    that.frames = 1;
//number of frames indexed from zero
    that.actualFrame = 0;
//start from which frame
    that.interval = 0;
//we don't need to switch animation frame
//on each game loop, interval will helps
//with this.

    that.draw = function(){
        try {
            ctx.drawImage(that.image, 0, that.height * that.actualFrame, that.width, that.height, that.X, that.Y, that.width, that.height);
//3rd agument needs to be multiplied by number of frames, so on each loop different frame will be cut from the source image
        } catch (e) {};

        if (that.interval == 4 ) {
            if (that.actualFrame == that.frames) {
                that.actualFrame = 0;
            } else {
                that.actualFrame++;
            }
            that.interval = 0;
        }
    that.interval++;
//all that logic above just
//switch frames every 4 loops  
    }
})();
Thanks for your attention. As usual, you can find final result in here: [Simple game with HTML5 Canvas] and all the sources on my Github account: [MichalBe].

Tutorial: Simple game with HTML5 Canvas
Part 1 - Introduction & Background
Part 2 - Character & Animation
Part 3 - Physics & Controls
Part 4 - Platforms & Collisions
Part 5 - Scrolling & Game States

Friday, September 10, 2010

Tutorial: Simple game with HTML5 Canvas - part 1

Check other language versions: [RUSSIAN]


Tutorial: Simple game with HTML5 Canvas
Part 1 - Introduction & Background
Part 2 - Character & Animation
Part 3 - Physics & Controls
Part 4 - Platforms & Collisions
Part 5 - Scrolling & Game States

If you are interested in news and updates of that tutorial just follow me on twitter: [MichalBe's Twitter]

Because 10KApart is closed now, and we are all waiting for the results, it is good time to remind my very simple "Stairs to heaven" game and explain in details how it was made.

INTRODUCTION
StH is very simple clone of Doodle Jump, but to be honest I was inspired by Icy Tower and discover DJ after I submit StH to the competition. Never mind.
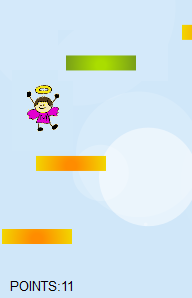
The goal is to control little angel & jump on the two kinds of platforms - orange (regular ones) and green (super high jump springboards). The game ends when the angel falls down to the bottom of the screen. Try it: [Stairs to heaven].
I create that game in about 8hours and later, after playing more and more, I discover few bugs so in this tutorial I want to fix it all. Let's do it!

Part 1. BACKGROUND
Because whole game, including images and scripts, couldn't be over 10K, I didn't want to use image on the background. It was cheaper to draw some generic-like stuff using canvas drawing functions.
First of all we need little HTML, nothing special, just one canvas element with some unique id, little bit of CSS and include of not existing yet game.js:
<html>
  <head>
    <title>Simple game with HTML5 Canvas</title>
  <style>
  body {
    margin:0px;
    padding:0px;
    text-align:center;
  }

  canvas{
    outline:0;
    border:1px solid #000;
    margin-left: auto;
    margin-right: auto;
  }
  </style>
  </head>
  <body>
    <canvas id='c'></canvas>
    <script src="game.js"></script>
  </body>
</html>
That's all in HTML we will need during this tutorial.
Ok, so let's create some Javascript.
First of all we need to create few global (for now, I know that global = evil) variables & change canvas attributes. That will be enough:
var width = 320,
//width of the canvas
  height = 500,
//height of the canvas

  c = document.getElementById('c'), 
//canvas itself 

  ctx = c.getContext('2d');
//and two-dimensional graphic context of the
//canvas, the only one supported by all 
//browsers for now

c.width = width;
c.height = height;
//setting canvas size 
First of all its important to understand one thing about canvas - it is not possible to move objects in the canvas surface. It's necessarily to clear it, whole or in the parts, on each frame. To achieve this, let's create clear() function.
var clear = function(){
  ctx.fillStyle = '#d0e7f9';
//set active color to #d0e... (nice blue)
//UPDATE - as 'Ped7g' noticed - using clearRect() in here is useless, we cover whole surface of the canvas with blue rectangle two lines below. I just forget to remove that line
//ctx.clearRect(0, 0, width, height);
//clear whole surface
  ctx.beginPath();
//start drawing
  ctx.rect(0, 0, width, height);
//draw rectangle from point (0, 0) to
//(width, height) covering whole canvas
  ctx.closePath();
//end drawing
  ctx.fill();
//fill rectangle with active
//color selected before
}
One colored clear background is boring as hell, so let's draw some clouds on it. Maybe not regular clouds, but simple, semitransparent circles imitating clouds. First we will draw some in random places of the canvas, each with different size and transparency. We will keep all the informations about circles in 2d array (there are no two-dimensional arrays in JS, best way to solve this is just put one Array into another).
var howManyCircles = 10, circles = [];

for (var i = 0; i < howManyCircles; i++) 
  circles.push([Math.random() * width, Math.random() * height, Math.random() * 100, Math.random() / 2]);
//add information about circles into
//the 'circles' Array. It is x & y positions, 
//radius from 0-100 and transparency 
//from 0-0.5 (0 is invisible, 1 no transparency)

var DrawCircles = function(){
  for (var i = 0; i < howManyCircles; i++) {
    ctx.fillStyle = 'rgba(255, 255, 255, ' + circles[i][3] + ')';
//white color with transparency in rgba
    ctx.beginPath();
    ctx.arc(circles[i][0], circles[i][1], circles[i][2], 0, Math.PI * 2, true);
//arc(x, y, radius, startAngle, endAngle, anticlockwise)
//circle has always PI*2 end angle
    ctx.closePath();
    ctx.fill();
  }
};
Nice, but boring less only a little. Why are the clouds standing still? Lets make a tiny little function with one Number type argument, which moves clouds down given number of pixels, and when particular circle disappears under the canvas, it will moves it on the top with changed position X, radius and transparency:
var MoveCircles = function(deltaY){
  for (var i = 0; i < howManyCircles; i++) {
    if (circles[i][1] - circles[i][2] > height) {
//the circle is under the screen so we change
//informations about it 
      circles[i][0] = Math.random() * width;
      circles[i][2] = Math.random() * 100;
      circles[i][1] = 0 - circles[i][2];
      circles[i][3] = Math.random() / 2;
    } else {
//move circle deltaY pixels down
      circles[i][1] += deltaY;
    }
  }
};
Now, last but not least, let's create main game loop and connect everything we create for now in there. Each frame will clear the screen, move circles 5px lower, draw them and after 1/50sec call another frame. I use two setTimeouts except one setInterval, but I'm not pretty sure why:). I know that there was some performance issues in IE back in the days or something. Also don't forget to add gLoop variable to that declared at the beginning.
var width = 320,  
//width of the canvas  
  height = 500,  
//height of the canvas  
  gLoop,
(...) //rest of the code goes here

var GameLoop = function(){
  clear();
  MoveCircles(5);
  DrawCircles();
  gLoop = setTimeout(GameLoop, 1000 / 50);
}
GameLoop();
According to Luis Giribone's comment below, I avoid Intervals and use Timeouts instead intentionally - Interval is called every 1000/fps seconds - even if the previous one disn't not finished yet. If you use Timeout, it will call another one only after previous was finished. I hope it is clear now. I also want to thanks Ped7g, author of Whiskas & Pedigree Javascript ad game for catching mistakes. Final result of that part should looks like this: [Simple game with HTML5 Canvas part 1], and sources are available on my Github account: [MichalBe] Tutorial: Simple game with HTML5 Canvas Part 1 - Introduction & Background Part 2 - Character & Animation Part 3 - Physics & Controls Part 4 - Platforms & Collisions Part 5 - Scrolling & Game States

Saturday, September 4, 2010

Zombie Eliminator & Real Decision Ball on bada

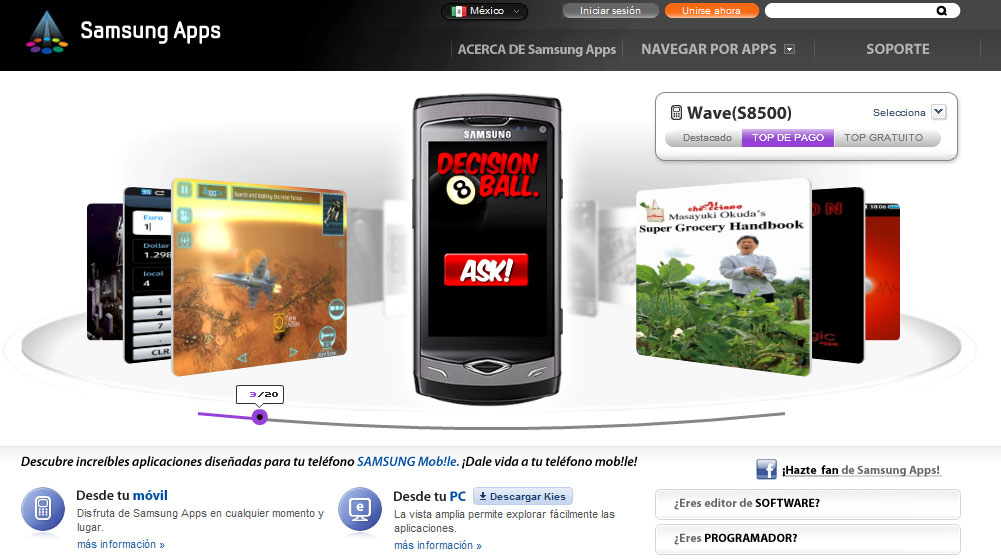
My Zombie Eliminator (first mobile game in 16 languages, available on Palm Pre & Pixi, Android & Samsung bada) was today on place 20. (out of near 1800) in 'top 50 paid apps' in Chinese Samsung Apps Store, 32. in Italian & Mexican, 44. in Australian and 46. in Turkish. I feel gently honored:).

And my other App, Real Decision Ball (also on Palm Pre & Pixi, Android & Samsung bada) is now number 3 in Mexican Market.

Tuesday, August 31, 2010

NodeKnockout - Massivetris

Try my first node.js app ever - created in 48h Massive Multiplayer Online Tetris. Choose from one of 72 avatars and play with others in realtime. It works best in Safari or Chrome, in Firefox WebSockets are emulated by Flash Plugin (awesome Socket.IO feature). There are couple of bugs I'm aware of, but it is possible to play and have some fun. If you enjoyed, don't forget to vote (button in right-top corner).
Direct links to the game: [Massivetris] and to the [Team Site].

And here is the source: [Massivetris]